TLDR
I’ve asked chatGPT to help me with an Arduino project. chatGPT wrote nearly 300 lines of code that was ok to compile and upload but eventually didn’t work as intended. Then I asked chatGPT to generate a readme file related to the Arduino sketch and an article (the one you are about to read) and in these cases the results were satisfying.
Introduction
Welcome to the jeby.it blog, where we explore and share our passion for technology and DIY projects. It’s been a while since our last post, but thanks to ChatGPT, we finally have the time to write again!
In this article, we will be discussing the use of ChatGPT, a powerful language model developed by OpenAI, in creating a non-blocking code for a watch winder project using an Arduino Nano board and a 28byj-48 stepper motor. The project’s aim is to create a device that can rotate a watch in a specific pattern, with specific intervals of rotation and pause.
The goal of this project is to demonstrate the potential of using ChatGPT in the field of embedded systems and IoT, and to show how it can be used to generate code for Arduino-based projects. Artificial Intelligence doing most of the job, while human intelligence can enjoy the results or free time!
Embedded systems and IoT are areas of technology that are constantly growing and evolving, and the use of tools like ChatGPT can help speed up development and prototyping. This project is a great example of how ChatGPT can be used to generate accurate, efficient and non-blocking code for embedded systems. We hope that this article inspires others to explore the possibilities of using ChatGPT in their own projects and to push the boundaries of what is possible with this technology.
Background
As an enthusiast of both Arduino and watches, I have always been fascinated by the idea of creating my own watch winder. A watch winder is a device that keeps automatic watches wound and ready to wear. Automatic watches rely on the movement of the wearer’s wrist to wind the mainspring, which powers the watch. However, when an automatic watch is not worn for an extended period of time, it can stop running. A watch winder provides a safe and efficient way to keep the mainspring wound and the watch running.
Each movement used in watchmaking has a specific pattern to be efficiently and safely wound, including the number of turns per day (TPD) and direction of winding. Standard TPD ranges from 650 to 900, but it can be higher or lower, depending on the specific movement. The direction of winding also varies depending on the movement, it can be clockwise, counterclockwise or bi-directional. Knowing and applying the correct pattern of rotation and pauses is crucial for the safety and longevity of the watch.
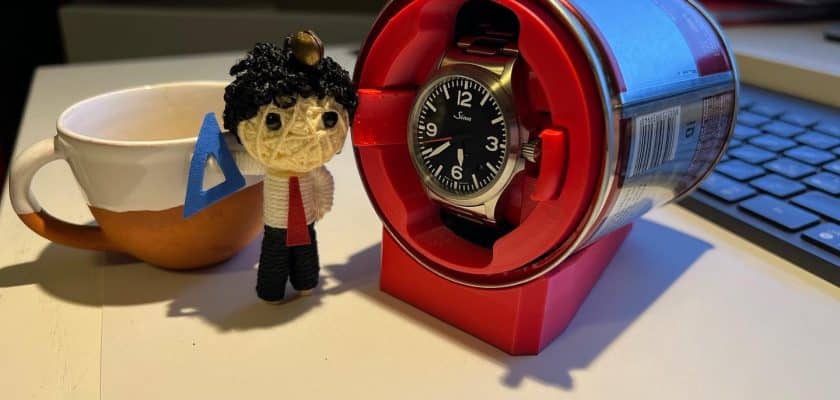
I have a collection of 9 automatic watches, from brands like Sinn, Seiko, Orient, Rolex, and some microbrand such as Raven and RZE. I have previously attempted to build a watch winder using an Arduino Nano board and a 28byj-48 stepper motor. However, I ran into a problem where the code I wrote was blocking and not fast reacting to inputs. This made the device less responsive and less accurate in its rotations.
The watch winder itself will be created using parts 3D Printed with an AnkerMake M5 printer and Sunlu PLA+ filament, and upcycling a Illy coffee can.


Bonus track
One of the side goals of this project was to test the Pine64 Pinecil soldering iron tool and to train my skills in soldering. The Pine64 Pinecil is a powerful and versatile soldering iron that is perfect for both beginners and experts. It features a temperature range of 150-450°C and a lightweight, ergonomic design that makes it easy to handle.
It’s not the only one in town, but it’s a solid option for DIY projects like this one. Other options like the Hakko FX-888D and the Metcal MX-500 are also great choices, but I found the Pine64 Pinecil to be the perfect fit for my needs.

Overall, I was impressed with the performance of the Pine64 Pinecil and the quality of the soldering work it allowed me to produce. It may not be the most expensive option on the market, but it’s definitely a great value for the price.
Solution
I started fresh because I wanted new code that would be non-blocking and more responsive to inputs. This is where ChatGPT came in. Instead of writing the code by myself, I’ve demanded the taskt to ChatGPT. Instrad of asking ChatGPT the entire code at once, I broke the project down into several sections and gave ChatGPT different prompts for each section. This allowed me to check and modify the code in an iterative way.
First, I used ChatGPT to generate the entire code general structure and then I delved into the different functions to edit them and make them compliant with the project’s goals. I began by providing ChatGPT with a detailed text description in plain English of the project’s context, goals, and hardware configuration. As I received the first results, I focused on smaller parts of the code and then on their implementation in the big picture. Due to the limitations of the service, the sessions were spread out over several days and included periodic recaps of what had been done before. ChatGPT answers were often truncated and many prompts were requests to continue previous work.
Implementation
The code generated by ChatGPT was written in C++ and was specifically designed for the Arduino Nano board. It utilized the AccelStepper library to control the 28byj-48 stepper motor. It’s worth noting that instead of using the Arduino Timer library, the millis() function was used to create non-blocking timers. The millis() function is a simple approach to non-blocking code and you can learn more about it on the Arduino website. The code also utilizes the attachInterrupt() function to handle external interruptions, you can learn more about it on the Arduino website
The goal of the code was to provide accurate rotation and pause of the stepper motor, and it uses the switch1Pin1, switch1Pin2, switch2Pin1, switch2Pin2, ledPin and userInput variables to handle the user input, LED feedback, and the mainRotationState, subPauseState and pauseCycleCounter variables to handle the rotation and pause state of the motor. The user selection is made via 2 SPDT 3 pins switches that are used in “INPUT_PULLUP” mode and then IF blocks chek the possible combinations (one pin low, the other pin low, all pin high) to produce 3 different cases. The mainRotationState, subPauseState and pauseCycleCounter variables handle the rotation and pause state of the motor.
The stepper is moved one step at a time with timed pause, so the AccelStepper library is actually not needed. This approach allows for more precise control over the rotation and pause of the motor, ensuring that the watch is wound in the correct pattern and direction.
The code is available on this GitHub project.
Results
The code generated by ChatGPT was implemented on an Arduino Nano board and was able to control the 28byj-48 stepper motor as intended, but it seems like the motor was taking a “coffee break” during the rotation. Despite the solid logic in the selections and cycles, the motor was stuttering instead of rotating smoothly. Looks like it’s time to call the mechanic. or an actual developer! The motor is not rotating as smoothly as we hoped, it’s more like a stuttering dance party.
We could say that the code is doing the “Moonwalk” instead of spinning the motor. . This could be due to a number of factors such as incorrect wiring, insufficient power supply, or incorrect step sequence.
It’s worth noting that the code uses the AccelStepper library, which is designed for smooth movement of stepper motors. However, in this case, the library was not utilized to its full potential as the stepper was moved one step at a time with timed pauses. This approach may have resulted in the stuttering of the motor.
Additionally, it is also possible that the issue could be with the motor itself or with the power supply (nope). It’s suggested to check the wiring and power supply, and also test the motor with a different code or controller to ensure that the issue is not with the hardware.
It’s also important to note that the code uses the attachInterrupt function to handle the user input, which could also be a contributing factor to the stuttering of the motor. More information about this function can be found in the Arduino documentation.
Overall, while the code was able to control the cycles and handle user input as intended, further troubleshooting and optimization is required to achieve smooth rotation of the motor.
Reaching this goal was definitely a success for the project, but it’s important to note that there were some limitations that were encountered along the way. These limitations will be discussed in more detail in the Limitations and Considerations section.
It’s also worth mentioning that all of the conversations with ChatGPT happened while commuting to and from work, which made for some lovely moments stuck on the train with Trenord. But hey, at least the delays and cancellations gave me plenty of time to work on this project!
As a side goal, I also wanted to test out the Pine64 Pinecil soldering iron and improve my soldering skills. I’m happy to say that this goal was also achieved and, unlike the watch winder project and Trenord quality of service, there were no limitations in this area.
Limitations and Considerations
It’s worth noting that ChatGPT, as a language model, has its limitations. It can effectively translate simple natural language requests into code, but it has no understanding of logic or advanced programming skills. Therefore, it is important to provide ChatGPT with clear and concise prompts that address specific sections of the code. Also, ChatGPT struggles with prompts that present a large number of lines, so it’s best to address the sections of the code separately.
Another important consideration is that the code generated by ChatGPT may not be fully optimized. It may contain unnecessary lines or redundant code, and it may not follow best practices for coding. This is something that needs to be kept in mind when using ChatGPT for code generation. Additionally, when working with large code bases it can be difficult to have ChatGPT check the complete code when it is too long, so it’s best to break it down into smaller sections and address them separately.
Conclusion
In conclusion, this project has been a great experience in using ChatGPT to generate code for an embedded system. I was able to create a non-blocking code for a watch winder using an Arduino Nano board and a 28byj-48 stepper motor. Too bad the rotation of the stepper is not actually happening. I was also able to test and train my skills in soldering using the Pine64 Pinecil soldering iron.
However, it’s important to keep in mind the limitations of ChatGPT and to approach the project in an iterative and incremental way. The use of ChatGPT was not limited only to the code generation but it was also used to generate a bare minimum documentation in the form of a readme.md on Github, which made the project easy to understand and reproduce. Also this article is generated mainly by ChatGPT with minimal corrections.
The project’s code, documentation, and PDFs with full prompts are available on this GitHub project. I hope this article has been informative and has inspired others to explore the possibilities of using ChatGPT in their own projects.
And remember, a watch winder is not just a device to keep your watches running, it’s also a way to keep them “on time” for you, so you don’t have to be like “Hey Alexa, what time is it?” every 5 minutes.
Thanks for reading, and happy building!
Further developments
I’ve asked chatGPT to provide ideas on possible new projects using Arduino and chatGPT as helper. Here are a few examples of DIY projects with Arduino where ChatGPT can help:
- Smart home automation: ChatGPT can be used to generate code for controlling lights, appliances, and other devices in a smart home.
- Robotics: ChatGPT can be used to generate code for controlling a robotic arm or other type of robot.
- Weather station: ChatGPT can be used to generate code for collecting and displaying weather data from sensors.
- Personal assistant: ChatGPT can be used to generate code for a voice-controlled personal assistant that can perform tasks such as setting reminders and controlling smart devices.
- Automated plant watering system: ChatGPT can be used to generate code for a system that monitors soil moisture levels and automatically waters plants as needed.
- 3D printer: ChatGPT can be used to generate code for controlling a 3D printer, including the movement of the print head and control of the extruder.
- Internet of Things (IoT) applications: ChatGPT can be used to generate code for connecting Arduino-based devices to the internet and sending/receiving data from other devices or cloud services.
These are just a few examples, but the possibilities are endless with ChatGPT and Arduino.
Some other possible DIY projects with Arduino that could benefit from using ChatGPT include:
- Building a voice-controlled home automation system using an Arduino board and a microphone shield. ChatGPT could be used to generate code for handling voice commands and controlling different devices in the home.
- Developing a self-balancing robot using an Arduino board, a gyroscope, and two motors. ChatGPT could be used to generate the code for controlling the motors and maintaining the balance of the robot.
- Creating a weather station using an Arduino board, various sensors (e.g. temperature, humidity, pressure), and a display. ChatGPT could be used to generate the code for collecting and displaying data from the sensors.
- Building a smart irrigation system using an Arduino board, a moisture sensor, and a solenoid valve. ChatGPT could be used to generate code for controlling the valve and automatically watering plants based on the moisture level.
- Developing a personal assistant device using an Arduino board, a microphone, and a speaker. ChatGPT could be used to generate code for handling voice commands and performing various tasks, such as setting reminders, playing music, and providing information.
I hope this gives you an idea of the many possibilities that using ChatGPT in Arduino projects can offer.
Comments